Did you know you can use your Apple Watch as a remote shutter to take photos and videos through your iPhone? I started doing this as a way to improve my weightlifting and gymnastics skills without having to rely on someone else to film my activities. With the Apple Watch and my phone I have become a one man film crew and can finally confirm if my squats went “below parallel”.
Follow along and see how you can start doing this if you have an Apple Watch or are thinking of getting one.
What Gets Filmed Gets Improved
Nowadays there are no excuses for filming yourself in order to improve your technique or to document your progress. Everyone has a smart phone with a powerful video camera in their pocket (or purse) within reach. Not only can you take regular videos, but now you can also take slow motion videos. Slow motion is great for honing more technical movements. You catch a lot more details when things are slowed down versus normal speed.
Taking selfie videos has been helpful in a number of areas during my CrossFit journey:
- Improving gymnastic movements. Am I pulling with my arms before driving with my hips during a ring muscle up? Are my legs together during handstand walks?
- Checking compound lift technique. Am I leaning to one side during my squat? Is my back straight during deadlifts?
- Olympic lift technique. Am I keeping my arms straight during the pull in the clean? Am I leaning too far forward when receiving the bar in the snatch?
- Documenting PR’s. It’s nice to have a written log of how much weight you lifted, but seeing it is even better.
- Documenting Fails. Saving and remembering the failures makes the success videos even better.
How I Used to Film Before Using the Apple Watch
Before using the Apple Watch to film myself I had two other methods:
- Ask someone to film me. This is annoying for me (having to ask someone) and probably annoying for them as they are trying to workout and not be someone’s cameraman.
- Use a separate bluetooth remote. I bought a selfie stick that came with a bluetooth remote shutter. After you paired it with your phone you could trigger a video to be taken. It worked OK, but one drawback is even if you trigger the phone to start taking a video you didn’t have any feedback if a video was actually being recorded. Meaning there would be times when I thought I was recorded, but it wasn’t.
The drawbacks of both of those options is framing yourself is difficult. With using someone else to film you have to trust their judgement of where they position you in the frame. With the bluetooth remote shutter you either have to use the front facing camera or use the better quality rear camera and kind of guess where you will be standing and hope you guessed right.
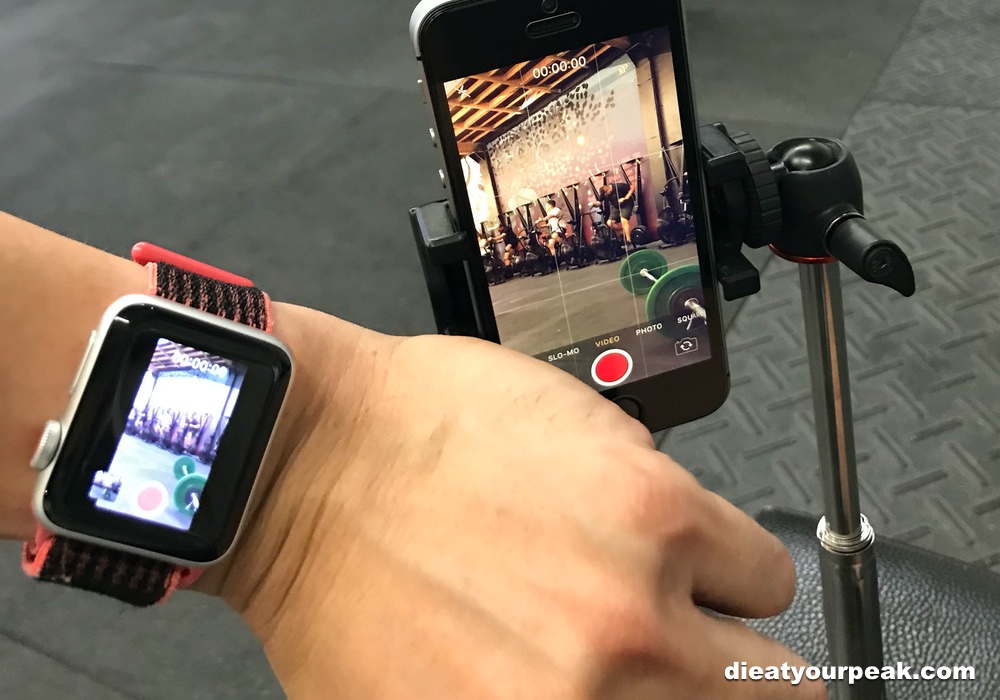
I don’t remember how I stumbled upon using the Apple Watch as a remote shutter, but it negated the issues I had with the other options. Not only can I use it to start and stop taking a video, but I can also view myself “live” before and during the video. This way I can move the barbell around, adjust any angles, or reposition myself in order to get a useful video.
My Current Apple Watch Filming Setup
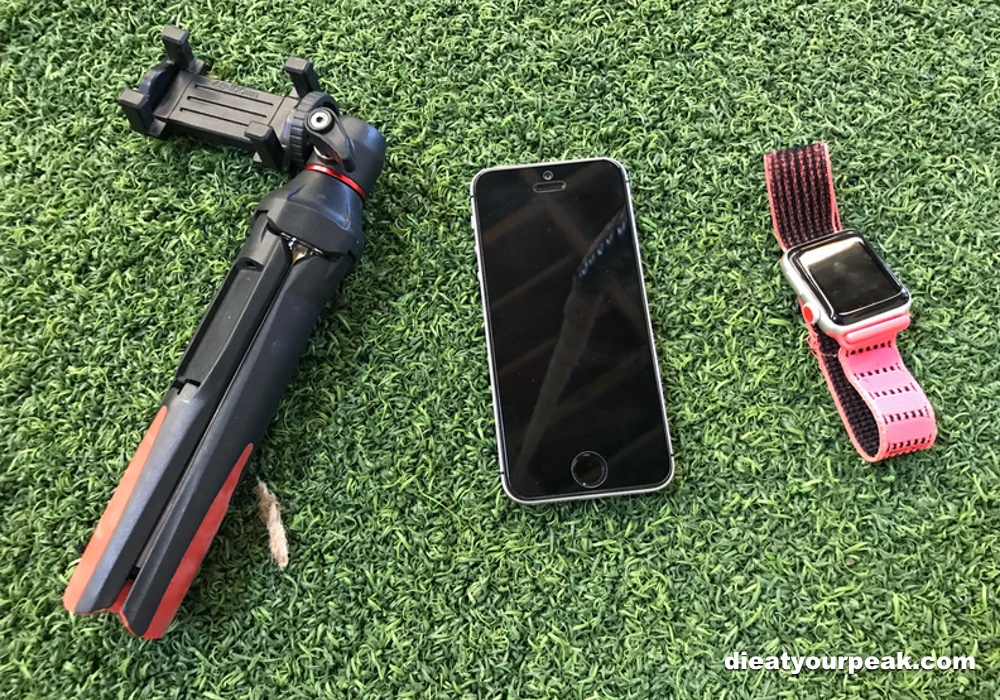
Right now my setup includes these devices and accessories:
- Apple Watch. Series 3 running Watch OS.
- iPhone SE. Yes, this is the tiny phone that some people think is the like the original iPhone, but I like this form factor.
- Extended battery case. My phone’s battery dies quickly especially when taking video so I use a battery case.
- Portable tripod. This tripod folds down compactly which makes storing in a gym bag no problem. Plus, it and has height adjustment.
How I Use It:

- Setup the phone in the tripod. I use the rear camera as the quality is better and if you want to take slow motion video you have to use the rear camera.
- Open the camera app on the iPhone. You can use the Apple Watch to open the camera app. When you tap on the Remote Camera app on the Watch it automatically open the camera app on your phone.
- Choose what kind of video to take. My iPhone SE is not very fancy so I only have 2 potential modes to choose from when shooting video, “slo-mo” or “video”.
- Open the Remote Camera app on the Watch. Tapping the app will connect with the phone. When successfully connected on your Watch screen you will see a live view from your phone’s camera. TIP: Sometimes there is a delay before anything will show up on your Watch screen (it will stay black for a little bit and you might think it’s not working). If this happens you can wait longer or I find if you just exit out of the home screen and tap the app icon again on your watch it seems to connect faster.
- Tap the red record button on the Watch. Tap once to start and tap again to stop.
Demo of Starting a Video Using the Watch:
Other Tips and Tracks:
- Control the focus. When the Apple Watch Camera app is opened and you are viewing the live feed you can tap anywhere on the screen to have the camera focus on that area
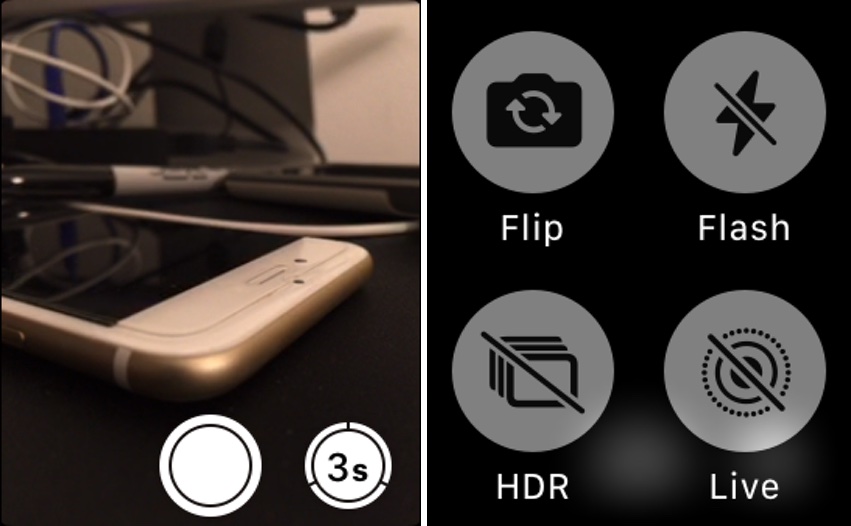
- Countdown timer. If you want to take a photos of yourself without the photo showing you looking at your watch as you take it then you can use the 3 second countdown timer. Simply tap the “3s” button and it will countdown from 3 seconds and then take a burst of 10 pictures.
- Toggle flash or switch camera. Force touching (long hard press on the watch face) while viewing the live feed will bring 4 additional options: switch to front or rear camera, toggle the flash, toggle HDR photos and toggle live photos.
Downsides to Apple Watch Remote Shutter
The main limitation to this recording method is that currently Apple doesn’t have a way to switch camera modes via the Watch. This means if you want to change modes photo to video or regular video to slow motion video you still have to do it through your iPhone’s interface. It’s a bummer, but still better than most solutions out there. At some point I’m sure Apple will roll out an update that will allow this.
Conclusion
If you have an Apple Watch then you should try this method of filming. You don’t even have to only use it for filming lifts. You can also use it to setup group photos. Whatever it may be let me know if you find this helpful in the comments. Or if you have any ideas on how use this let me know. There you go with this setup it makes recording yourself a breeze with no additional equipment (beside a tripod if you are so inclined). Start recording those PR’s.

you can shoot hard to get wildlife photos by removing yourself from the area and using watch remote.
That’s a great point! I’ve never thought about that. Though, my fear is that some random raccoon would still my iPhone!